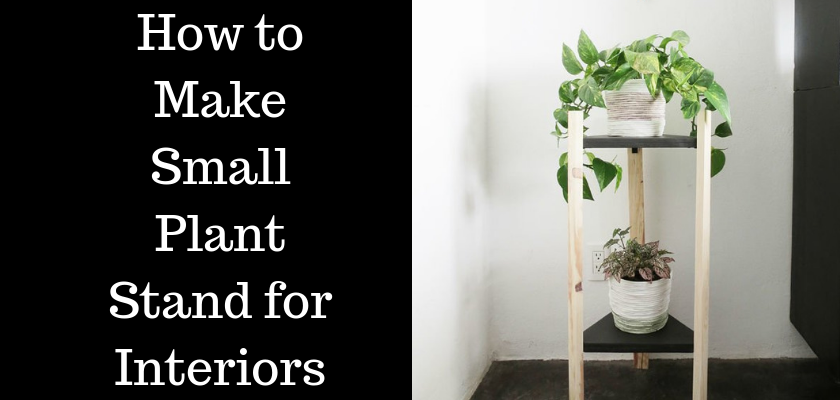
How to Make Small Plant Stand for Interiors

Plant stands add effect to a plant display, whether indoors or outdoors. While many plant stands are offered for purchase, recycling other materials into stands or usage of stands in a brand new way sets your display apart. Some innovative plant stand ideas will save money while raising up your potted plants for extreme visibility and magnificence.
Appreciate the beauty of artful plant displays, as well as the plant enthusiast’s skill to keep the greenery alive! Seriously, it takes some ability to preserve plants, even the low-maintenance ones. Check out this best indoor plant stand and then let it motivate you as you curate and plan your own collection.
Supplies You Will Need
|
1×2 lumber or trim (8 feet)
|
Pencil |
Ruler |
Hand Saw |
|
22mm plywood |
Set Square |
Jigsaw |
60grit and 120grit sandpaper |
|
Cloth |
1½inch metal corner brace (6) |
½inch screws |
Cordless drill/driver |
|
Wood glue |
Rust-Oleum Varathane Premium Fast Dry Wood Stains |
Rust-Oleum Varathane Water-Based Triple Thick Polyurethane |
Paint Brush |
Step-1
You need to saw the 1×2 wood into three 31″-lengthy portions to create the legs. Be alert to make your cuts straight so that the cut edges at each end make flat feet for a durable plant stand.
Step-2
Next step to do is to draw and cut two triangular shapes on the 22mm plywood to make the shelves.
Utilize a ruler and a set square to draw the first equilateral triangle with 14-inch sides on your board. Then, at every corner, just plan where you’ll cut off the tip and here, you’ll fix a leg to the shelf. To do this, you need to measure and mark 2 inches from the corner on each connecting side, then draw a line connecting both points. Repeat on the other two corners. Then cut along all lines utilizing the jigsaw.
Now you need to draw and cut another identical trimmed triangle to make the lower shelf.
Step-3
With all pieces cut, sand them with two kinds of sandpaper—first with a 60-grit paper, then with a 120-grit paper to provide the wood a smooth finish.
Remove the sawdust with a damp cloth.
Step-4
Stain the triangular shelves with Rust-Oleum Varathane Premium Fast Dry Wood Stains.
Step-5
Prepare the legs to gather the DIY plant stand. Now you need to put them side by side on an even surface, and measure and mark 8 inches from the bottom on each. Next step is, you need to make a second mark 20 inches above the first one (28 inches from the bottom) on each leg.
Now, double check your measurements. Verify that the marks are at the exact same height on every leg to be sure that you construct a level plant stand. Then, fasten two 1-½-inch corner braces on each leg with ½-inch screws, arrange in a line them just below the mark.
Step-6
Stand the 3 legs with the corner braces going through inward. Then, collect your DIY plant stand by putting a triangular shelf at each level on top of a set of braces.
What is next, just screw them through the corner braces and into the bottom of a corner of a shelf. For more strength, you may add a little glue between the shelves’ corner edges and the legs earlier than doing so.
Step-7
Your finished DIY plant stand will look extra professional if the wooden corner braces supporting each level don’t stand out. Coat it with an advanced self-leveling formula that enables projects to be completed in one coat. Utilize Rust-Oleum Varathane Water-Based Triple Thick Polyurethane for outstanding scratch & stain resistance.
Closure
Indoor plants offer lots of advantages not just for homes however likewise for offices and other areas. The way you show them also has an important effect on the technique they affect you and the design.

